基于HTTP的流量路由/转移
本任务将向您展示如何逐步将流量从一个版本的微服务迁移到另一个版本。例如,您可以将流量从旧版本迁移到新版本。
一个常见的用例是将流量从一个版本的微服务逐渐迁移到另一个版本。在 Istio 中,您可以通过配置一系列规则来实现此目标, 这些规则将一定百分比的流量路由到一个或另一个服务。
在本任务中,您将会把 50% 的流量发送到 reviews:v1,另外 50% 的流量发送到 reviews:v3。然后,再把 100% 的流量发送到 reviews:v3 来完成迁移。
基于权重的路由
==== 1. 基于权重的路由
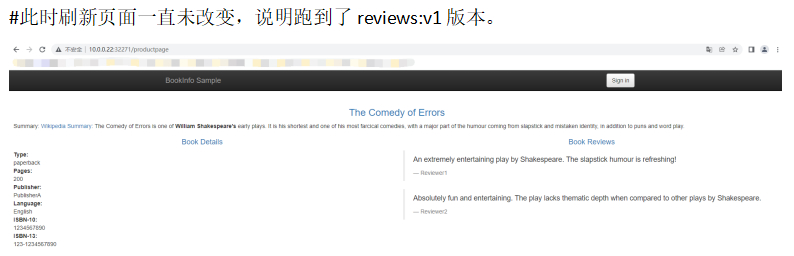
#首先,将所有流量路由到各个微服务的 v1 版本
[root@node-2 istio-1.9.5]# kubectl apply -f samples/bookinfo/networking/virtual-service-all-v1.yaml
virtualservice.networking.istio.io/productpage created
virtualservice.networking.istio.io/reviews created
virtualservice.networking.istio.io/ratings created
virtualservice.networking.istio.io/details created
[root@node-2 istio-1.9.5]# less samples/bookinfo/networking/virtual-service-reviews-50-v3.yaml
apiVersion: networking.istio.io/v1alpha3
kind: VirtualService
metadata:
  name: reviews
spec:
  hosts:
    - reviews
  http:
  - route:
    - destination:
        host: reviews
        subset: v1
      weight: 50
    - destination:
        host: reviews
        subset: v3
      weight: 50


#把 50% 的流量从 reviews:v1 转移到 reviews:v3
[root@node-2 istio-1.9.5]# kubectl apply -f samples/bookinfo/networking/virtual-service-reviews-50-v3.yaml
virtualservice.networking.istio.io/reviews configured
#确认规则已被替换
[root@node-2 istio-1.9.5]# kubectl get virtualservice reviews -o yaml
apiVersion: networking.istio.io/v1beta1
kind: VirtualService
metadata:
......
  name: reviews
  namespace: default
......
spec:
  hosts:
  - reviews
  http:
  - route:
    - destination:
        host: reviews
        subset: v1
      weight: 50
    - destination:
        host: reviews
        subset: v3
      weight: 50
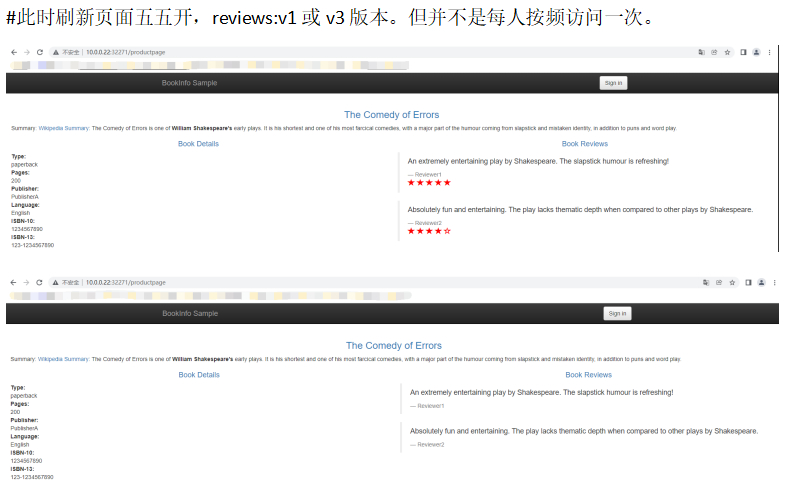
刷新浏览器中的 /productpage 页面,大约有 50% 的几率会看到页面中出带 红色 星级的评价内容。这是因为 v3 版本的 reviews 访问了带星级评级的 ratings 服务,但 v1 版本却没有。
在目前的 Envoy sidecar 实现中,可能需要刷新 /productpage 很多次–可能 15 次或更多–才能看到正确的流量分发的效果。您可以通过修改规则将 90% 的流量路由到 v3,这样能看到更多带红色星级的评价。
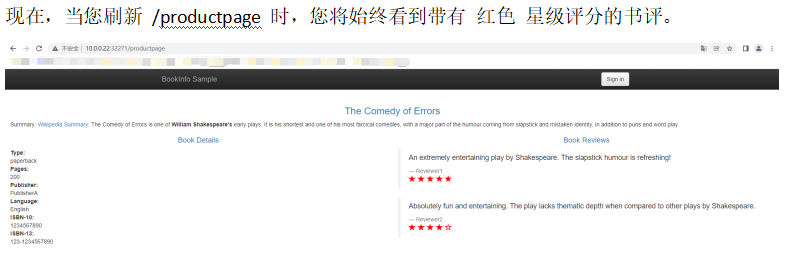
如果您认为 reviews:v3 微服务已经稳定,你可以通过应用此 virtual service 规则将 100% 的流量路由到 reviews:v3。
#服务都打到v3版本去。这个过程中也可以不断切换流量的百分比。
[root@node-2 istio-1.9.5]# less samples/bookinfo/networking/virtual-service-reviews-v3.yaml
apiVersion: networking.istio.io/v1alpha3
kind: VirtualService
metadata:
  name: reviews
spec:
  hosts:
    - reviews
  http:
  - route:
    - destination:
        host: reviews
        subset: v3
[root@node-2 istio-1.9.5]# kubectl apply -f samples/bookinfo/networking/virtual-service-reviews-v3.yaml
virtualservice.networking.istio.io/reviews configured
清理环境
[root@node-2 istio-1.9.5]# kubectl delete -f samples/bookinfo/networking/virtual-service-all-v1.yaml
virtualservice.networking.istio.io "productpage" deleted
virtualservice.networking.istio.io "reviews" deleted
virtualservice.networking.istio.io "ratings" deleted
virtualservice.networking.istio.io "details" deleted
基于TCP的流量路由/转移
这个bookinfo并不包含基于TCP的服务。
这里部署基于TCP的服务。
本任务展示了如何逐步将 TCP 流量从微服务的一个版本迁移到另一个版本。例如,将 TCP 流量从旧版本迁移到新版本。
在 Istio 中,您可以通过配置一系列规则来实现此目标,这些规则按指定的百分比将流量路由到不同的服务。在此任务 中,将先把 100% 的 TCP 流量分配到 tcp-echo:v1,然后,再通过配置 Istio 路由权重把 20% 的 TCP 流量分 配到 tcp-echo:v2。
部署微服务 tcp-echo 的 v1 版本
#### 1. 部署微服务 tcp-echo 的 v1 版本


# 为测试 TCP 流量转移创建命名空间
[root@node-2 istio-1.9.5]# kubectl create namespace istio-io-tcp-traffic-shifting
namespace/istio-io-tcp-traffic-shifting created

# 将 istio-io-tcp-traffic-shifting namespace 标记为 istio-injection=enabled
[root@node-2 istio-1.9.5]# kubectl label namespace istio-io-tcp-traffic-shifting istio-injection=enabled
namespace/istio-io-tcp-traffic-shifting labeled

# 使用 kubectl 部署服务
[root@node-2 istio-1.9.5]# less samples/tcp-echo/tcp-echo-services.yaml
apiVersion: v1
kind: Service
metadata:
  name: tcp-echo
  labels:
    app: tcp-echo
    service: tcp-echo
spec:
  ports:
  - name: tcp
    port: 9000
  - name: tcp-other
    port: 9001
  # Port 9002 is omitted intentionally for testing the pass through filter chain.
  selector:
    app: tcp-echo
---
apiVersion: apps/v1
kind: Deployment
metadata:
  name: tcp-echo-v1/v2
  labels:
    app: tcp-echo
    version: v1
......
[root@node-2 istio-1.9.5]# kubectl apply -f samples/tcp-echo/tcp-echo-services.yaml -n istio-io-tcp-traffic-shifting
service/tcp-echo created
deployment.apps/tcp-echo-v1 created
deployment.apps/tcp-echo-v2 created


[root@node-2 istio-1.9.5]# kubectl get pods -n istio-io-tcp-traffic-shifting -o wide
NAME                           READY   STATUS    RESTARTS   AGE     IP             NODE     NOMINATED NODE   READINESS GATES
tcp-echo-v1-7dd5c5dcfb-7vmt4   2/2     Running   0          3m36s   10.233.45.32   node-3   <none>           <none>
tcp-echo-v2-56cd9b5c4f-rg6r6   2/2     Running   0          3m36s   10.233.25.14   node-1   <none>           <none>
将目标为 tcp-echo 的 TCP 流量全部路由到 v1 版本
#没gateway了,需要自己新建一个gateway。
[root@node-2 istio-1.9.5]# kubectl apply -f samples/tcp-echo/tcp-echo-all-v1.yaml -n istio-io-tcp-traffic-shifting
gateway.networking.istio.io/tcp-echo-gateway created
destinationrule.networking.istio.io/tcp-echo-destination created
virtualservice.networking.istio.io/tcp-echo created
确认 tcp-echo 服务已启动并开始运行
#### 3. 确认 tcp-echo 服务已启动并开始运行

#先使用下面命令获取 gateway 的 tcp 端口,并设置INGRESS_HOST

[root@node-2 istio-1.9.5]# export INGRESS_PORT=$(kubectl -n istio-system get service istio-ingressgateway -o jsonpath='{.spec.ports[?(@.name=="tcp")].nodePort}')
[root@node-2 istio-1.9.5]# echo $INGRESS_PORT
30996

#设置nodePort启动的IP地址
[root@node-2 istio-1.9.5]# export INGRESS_HOST=10.0.0.22


#向微服务 tcp-echo 发送 TCP 流量(了解下nc)

[root@node-2 istio-1.9.5]# echo "hello"| nc $INGRESS_HOST $INGRESS_PORT
one hello

您应该注意到,所有时间戳的前缀都是 one ,这意味着所有流量都被路由到了 tcp-echo 服务的 v1 版本。
将 20% 的流量从 tcp-echo:v1 转移到 tcp-echo:v2
#### 4. 将 20% 的流量从 tcp-echo:v1 转移到 tcp-echo:v2

[root@node-2 istio-1.9.5]# less samples/tcp-echo/tcp-echo-20-v2.yaml
apiVersion: networking.istio.io/v1alpha3
kind: VirtualService
metadata:
  name: tcp-echo
spec:
  hosts:
  - "*"
  gateways:
  - tcp-echo-gateway
  tcp:
  - match:
    - port: 31400
    route:
    - destination:
        host: tcp-echo
        port:
          number: 9000
        subset: v1
      weight: 80
    - destination:
        host: tcp-echo
        port:
          number: 9000
        subset: v2
      weight: 20

[root@node-2 istio-1.9.5]# kubectl apply -f samples/tcp-echo/tcp-echo-20-v2.yaml -n istio-io-tcp-traffic-shifting
virtualservice.networking.istio.io/tcp-echo configured
# 确认规则配置已替换完成
[root@node-2 istio-1.9.5]# kubectl get virtualservice tcp-echo -o yaml -n istio-io-tcp-traffic-shifting
apiVersion: networking.istio.io/v1beta1
kind: VirtualService
metadata:
......
  name: tcp-echo
  namespace: istio-io-tcp-traffic-shifting
......
spec:
  gateways:
  - tcp-echo-gateway
  hosts:
  - '*'
  tcp:
  - match:
    - port: 31400
    route:
    - destination:
        host: tcp-echo
        port:
          number: 9000
        subset: v1
      weight: 80
    - destination:
        host: tcp-echo
        port:
          number: 9000
        subset: v2
      weight: 20
#向 tcp-echo 服务发送更多 TCP 流量
[root@node-2 istio-1.9.5]# for i in {1..10}; do \echo "hello" | nc $INGRESS_HOST $INGRESS_PORT; \
> done
one hello
one hello
one hello
one hello
one hello
two hello
one hello
one hello
one hello
one hello
现在应该发现,有大约 20% 的流量时间戳前缀是 two ,这意味着有 80% 的 TCP 流量路由到了 tcp-echo 服务的 v1 版本,与此同时有 20% 流量路由到了 v2 版本。
清理环境
[root@node-2 istio-1.9.5]# kubectl delete -f samples/tcp-echo/tcp-echo-all-v1.yaml -n istio-io-tcp-traffic-shifting
gateway.networking.istio.io "tcp-echo-gateway" deleted
destinationrule.networking.istio.io "tcp-echo-destination" deleted
virtualservice.networking.istio.io "tcp-echo" deleted
[root@node-2 istio-1.9.5]# kubectl delete -f samples/tcp-echo/tcp-echo-services.yaml -n istio-io-tcp-traffic-shifting
service "tcp-echo" deleted
deployment.apps "tcp-echo-v1" deleted
deployment.apps "tcp-echo-v2" deleted
[root@node-2 istio-1.9.5]# kubectl delete namespace istio-io-tcp-traffic-shifting
namespace "istio-io-tcp-traffic-shifting" deleted
标题:Kubernetes(十三)istio(13.7)流量转移
作者:yazong
地址:https://blog.llyweb.com/articles/2022/12/24/1671815697848.html